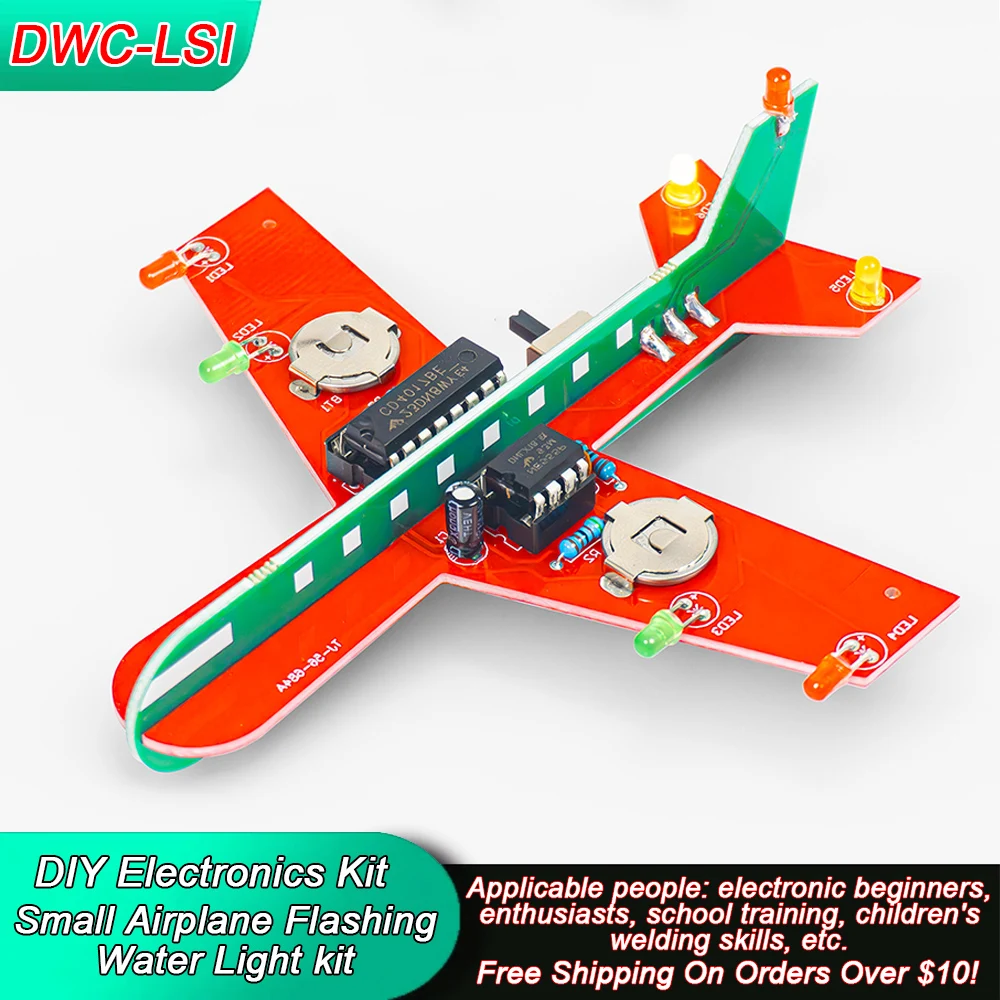
DIY Electronic Kit Small Airplane CD4017 Flow Lamp Welding Practice Electronic Science Assembly Kit Flashing LED PCB
DIY Electronic Kit Small Airplane CD4017 Flow Lamp Welding Practice Electronic Science Assembly Kit Flashing LED PCB
Couldn't load pickup availability
SPECIFICATIONS
Brand Name: NoEnName_Null
Model Number: /
Origin: Mainland China
Hign-concerned Chemical: none
Condition: New
Type: /
Supply Voltage: /
Dissipation Power: /
is_customized: Yes
Operating Temperature: /
Application: /
Package: DIP
Choice: yes
semi_Choice: yes
DIY Electronic Kit Small Airplane CD4017 Flow Lamp Welding Practice Electronic Science Assembly Kit Flashing LED PCB
1. Introduction:
It is an airplane flashing LED circuit DIY kit. It can simulate the flashing effect of airplane lights and DIY to create a very artistic desktop decoration. Not only can it be used as a DIY electronic soldering kit, allowing you to better understand circuits and learn how to solder, it can also be used as a very suitable experimental workbench tool.
2. Features:
1>.Simulating aircraft design
2>.Interesting DIY hand welding
3>.Simple and easy to operate
3. Parameters:
1>.LED color: red/green/yellow
2>.Battery type: CR1220
3>. Working temperature: -20℃~85℃
4>.Working humidity: 0%~95%RH
5>. Size (after installation): 110*105*33mm
4.Component list:
1>There is a DIP-16 CD4017BE decimal counter at U2.
2>.1 DIP-8 NE555P timer in U1.
3>.1 DIP-16 IC socket is located at U2.
4>.1 DIP-8 IC socket is located at U1.
5>.1pcs 1Kohm metal film resistor R3.
6>.1pcs 5.1Kohm metal film resistor R2.
7>.1pcs 10Kohm metal film resistor R1.
8>.Three 3mm red LEDs are located at LED1, LED4 and LED7.
9> There are two 3mm green LEDs at LED2 and LED3.
10>.2 3mm yellow LEDs are located at LED5 and LED6.
11>.1x 0.01uF 103 ceramic capacitor at C2.
12>A 10uF electrolytic capacitor at C1.
13>.1 SW power switch.
14>.1 CR1220 lithium battery is at BT1 and BT2.
15>. One CR1220 lithium battery socket is located at BT1 and BT2.
16>.2 PCB circuit boards
5.Application:
1>.Welding skills training
2>.Student school
3>.DIY production
4>.Project design
5>.E-sports
6>.Gift giving
7>.Craft collection
8>.Home decoration
9>.Souvenir collection
10>.Graduation project
11>.Holiday gifts
6. Installation tips:
1>.Users need to prepare welding tools first.
2>.Please wait patiently for the installation to complete.
3>. This kit is a DIY kit and needs to be installed by the user.
4>. The soldering iron cannot contact the component for a long time (1.0 seconds), otherwise the component will be damaged.
5>. Pay attention to the positive and negative poles of the components.
6>.Short circuit is strictly prohibited.
7>. Prioritize installation of complex components.
8>. Make sure all parts are in the correct direction and correct position.
9>. Please wear anti-static gloves or anti-static wrist strap when installing electronic components.
10>. It is strongly recommended to read the installation manual before starting the installation! ! !


